skip to main |
skip to sidebar
[Posted by Ruth]
Last year, I made a fairly miserable meal out of grilled baby bok choy. It was completely my fault; didn't wash it enough, didn't marinade it enough and didn't grill it long enough. So, aside from being gritty, tasteless and undercooked, it was terrific.
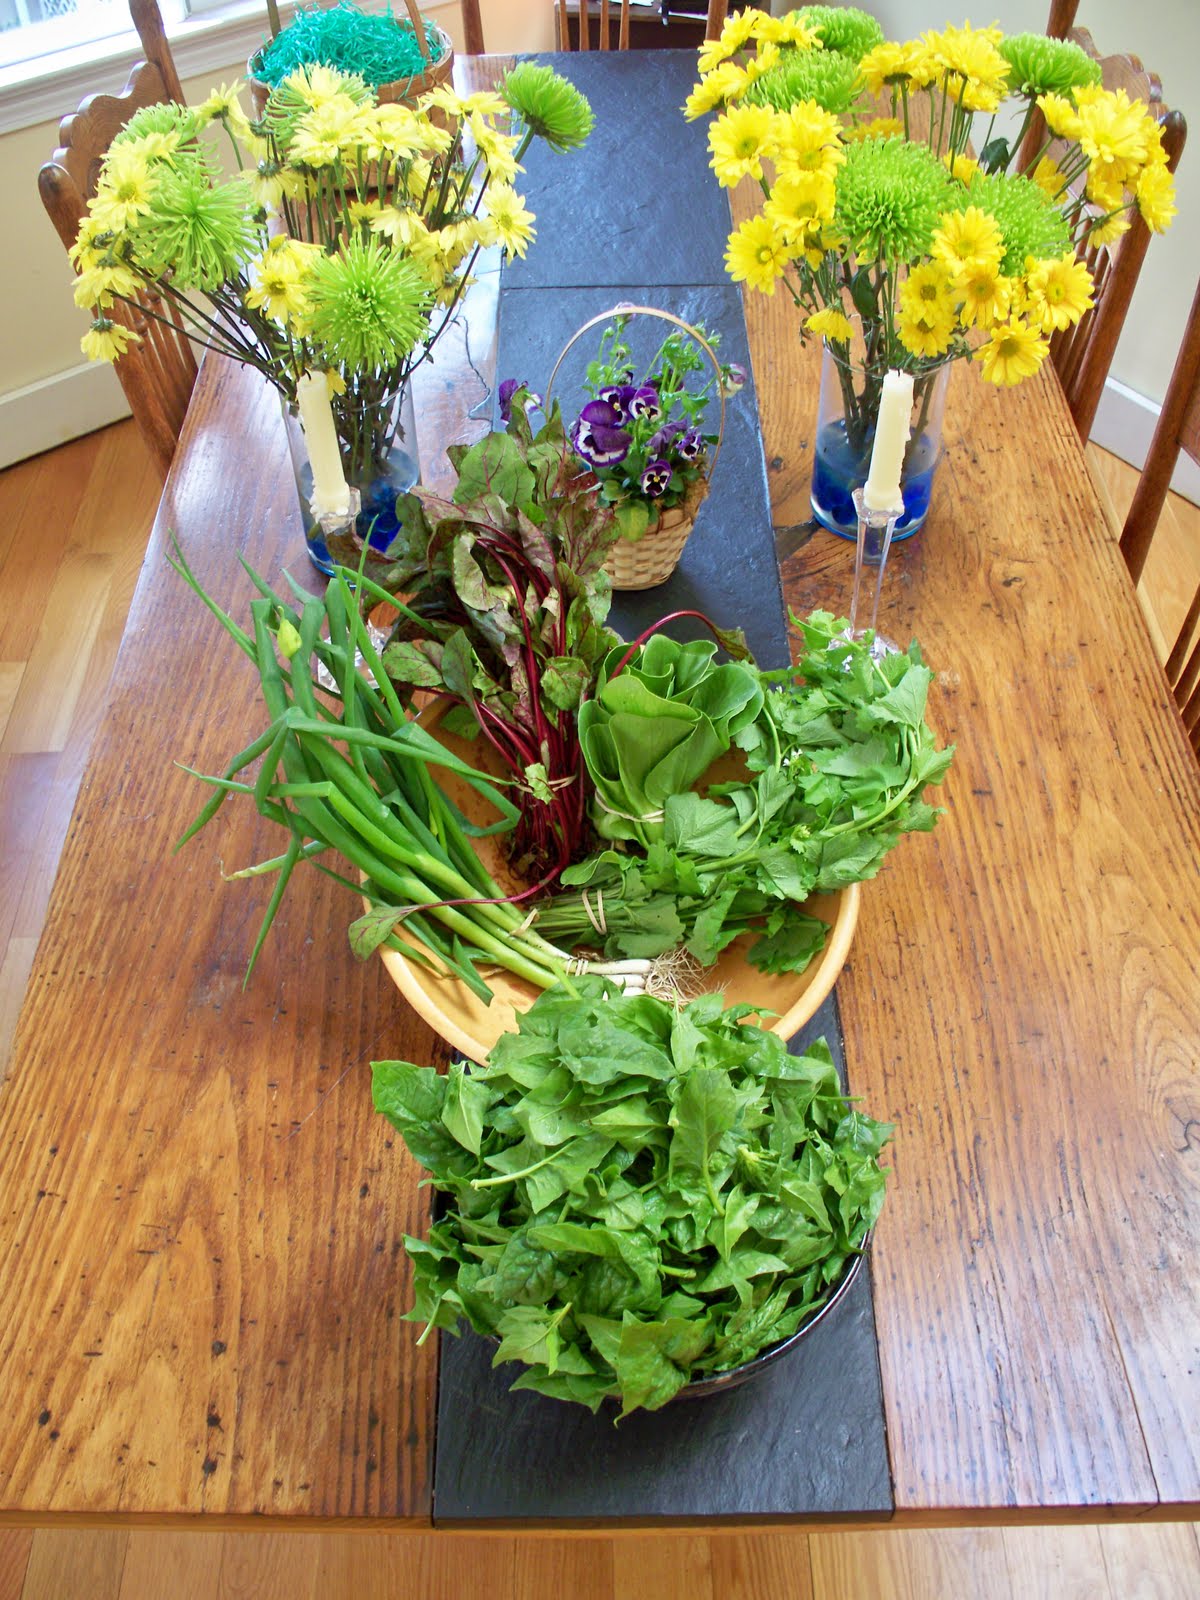
Fast forward to the last two weeks. We got some Baby Bok Choy in each box.
Look at it sitting there, green and cute....mocking me... It was time to face my bok choy fears.
Baby Bok Choy and Shrimp Braised in Coconut Curry Sauce
6 small heads of baby bok choy, cut in half (cut larger ones in quarters)
(note, wash them again after cutting, grit hides down in the recesses of the leaves)
1 T butter
1 T olive oil
1 lb medium raw shrimp, cleaned
1 can coconut milk (I used light)
2 T red curry paste (or more to taste)
2 T natural peanut butter
2 T brown Sugar
salt, pepper to taste
Heat butter and olive oil in a large, nonstick pan over medium, high heat and lightly brown the baby bok choy on the cut side. Remove bok choy from pan and set aside.
Lower the heat on the pan and stir in the curry paste, peanut butter and brown sugar. Cook, stirring constantly, until all is well incorporated and the mixture begins to get very fragrant. Stir in the can of coconut milk, raise the heat, bring to a slow boil and cook, stirring, for about 5 minutes to thicken slightly. Taste sauce and add salt and pepper as needed. Place the bok choy back in the pan, pressing the cut sides down into the sauce and simmer, covered, for about 5 minutes. Add the shrimp, pressing them down into the sauce as well. Simmer, uncovered, until the bok choy is tender and the shrimp is cooked through, about 5 more minutes. Serve with Jasmin Rice.
It was flavorful, cooked enough, not gritty and still a reasonably quick meal to prepare. This round goes to me, Baby Bok Choy.
[Posted by Ruth]
The 3rd installment of our Spring Share brought an interesting twist, Garlic Mustard. I've pulled this flowering weed out of my own herb garden, but never thought to eat it. The taste is mild and reminiscent of garlic, much milder than the Garlic Scapes we're looking forward to later in the season. Garlic Mustard can be used raw in salads, or for pesto, but I decided to cook it with the the Beet Greens we got this week. I sauteed them with bacon and some onion, added black eyed peas and served them over 'Forbidden Rice'.
Forbidden Rice is a small grain black rice, originally from China. It got its name because it was a favorite of the Emperor and, therefore, forbidden to the general public. The rice has a mild, nutty flavor, a firm texture and actually cooks up quite purple, also coloring the cooking liquid purple.
Sauteed Garlic Mustard and Beet Greens over 'Forbidden Rice'
1 bunch Garlic Mustard, leaves and flower buds, coarsely chopped
1 bunch Beet Greens, coarsely chopped
4-6 oz Bacon, cubed
3/4 cup finely chopped onion
1 1/2 cups cooked black eyed peas
zest of one lemon
salt and pepper to taste
1 cup, raw, Forbidden Rice, cooked according to package directions or any other rice of your choosing. The Forbidden Rice takes about 30-40 minutes, so start this first.
As always, wash the heck out of the greens and spin them dry.
Heat a large, heavy skillet over medium, high heat and saute the bacon until it is beginning to crisp and the fat has rendered out. Note, if there is more than a few tablespoons of fat in the pan at this point, remove the pan from the heat and soak up the excess fat with a paper towel. You want enough to coat and cook the greens, but no so much that it becomes greasy.
Add the onions to the remaining drippings and bacon and cook over medium heat until the onions soften. Stir in the Garlic Mustard and Beet Greens and cook, stirring, until wilted. Fold in the black eyed peas, lemon zest and salt and pepper to taste and cook until heated through and incorporated, 5-10 minutes over medium low heat.
Serve over the rice. You can pass yogurt or goat cheese to garnish, if desired.
This was another quick and healthy weeknight meal; on the table in under an hour.
[Posted by Ruth]
Our Spring Farm Share from Stone Gardens Farm will now be sending us a box a week. This means I will no longer be found frowning and muttering in the produce section of my local store. Just in time, I think I was starting to scare people. Here's what we got this week:
A large bunch of Dandelion Greens
A bag of Spinach
A bag of baby Kale
A bag of baby Lettuce
Small bunch of Radishes
Large bunch of Scallions
1 dozen Eggs
We added in 1 cut up chicken and were also able to get 4 more packages of their terrific Ground Beef.
I got everything washed and prepped right away. Last year taught me how important it is to do this. We went for the Dandelion Greens first and had them Thursday night.
Lamb and Dandelion Greens
This is a little bit of a cheat since the instructions should read, "First, cook too much lamb for Easter dinner." We used up our leftover lamb with this dish, but you could use any leftover lamb, beef, pork or chicken to add meat to this.
Approx 3 cups cooked lamb (or other meat) cut into small cubes
1/2 large onion, finely chopped
2 cloves garlic, finely minced
1 T olive oil
1 bunch Dandelion Greens, washed, spun dry and coarsely chopped
Zest of 1/2 lemon, finely chopped
1 T Herbs de Provence (if you don't have this a mixture of thyme and tarragon can be substituted)
Salt and Pepper to taste
1/3 cup cream
Heat olive oil in a large heavy pan over medium heat, add the onions and garlic and cook slowly until softened and a bit caramelized. Stir in meat and the Herbs de Provence and continue heating until it warms through. Add in the dandelion greens and lemon zest and cook stirring until the greens are wilted. Stir in the cream, salt and pepper and cook over slightly higher heat until the cream thickens. Serve over rice, grains or pasta.
One caution on dandelion greens. Wash them thoroughly by submerging them in several changes of water. Do this until you are sure they are clean and then do it about 2 more times. Just rinsing will not get all the dirt out.
[Posted by Ruth]
Our CSA, Stone Gardens Farm gave us a really great opportunity to purchase a Spring Greens share in addition to our full share and our first small pickup was this week. In our box we got a bunch of leeks, 2 pounds of very sweet baby carrots, a good sized bag each of baby lettuce and Asian mix and a dozen fresh eggs. It felt to good to be back picking up our box of fresh produce. It has definitely be a tough winter at the grocery store. Having regular access for part of the year to truly fresh food really spoils a person. I found myself looking down my nose at almost everything in the stores during these 'dark days'.
With the fresh leeks in hand and Spring in the air, a tart seemed like the thing to do.
Tart of Spring Leeks with Avocado
I used the same, healthier version, olive oil crust I used in this recipe.
You can use this or your favorite tart crust.
Roll crust out and place in a removable bottom tart pan.
Filling:
2 Ripe Avocados, halved and sliced lengthwise.
a bit of lemon juice to coat the Avocado slices and keep them green
1 small bunch of leeks, most of the green cut off, split in half lengthwise, cleaned and finely sliced
1 T Olive Oil
5 oz Fresh Goat Cheese, or other cheese, if you prefer
Salt and pepper to taste.
Preheat oven to 425. In a nonstick pan, heat the olive oil and gently cook the leeks with a bit of salt and pepper until they are softened. In the case of the leeks we used, they were already so fresh and tender they needed very little time in the pan. Larger leeks will take a bit longer to soften. Remove pan from heat.
Arrange the avocado slices around the tart pan, season with salt and pepper. Top with the leeks, distributing evenly and dot over the top with the cheese. Bake for approx. 25 minutes, until cheese has browned a bit and crust seems done. Remove from oven and let sit for at least 10 minutes before slicing. Can be served hot or at room temperature.
It was just what I was going for, light, fresh and definitely like Spring.
[Posted by Ruth]
With all the squashes and carrots in the winter share, there's a pronounced orange hue to the food around here lately. Still, I want to use it all and find a way to make things taste different, even it they are all starting to to look the same. The large bag or carrots we got in the January winter share have retained their sweetness and crispness so it seemed like it was time to feature them in a dish. I wanted to make a savory carrot souffle; I saw a lot of recipes for sweet ones on the internet but wanted to make one that felt more substantial to go with the cold, nasty, snowy, kill me is it Spring yet? weather we've been having lately.
This may initially sound like a lot of steps, but it actually went together without too much trouble. Because of the weight of the carrots and grits, this will not puff way up as some souffles, but it will still be light and airy inside.
Savory Carrot Souffle
2 lbs carrots, scrubbed, trimmed and cut into 1/2" rounds
1/2 cup onion, finely chopped
1 T olive oil
3 T Grits
1 cup milk
1 1/3 cups grated cheddar cheese
1/4 tsp finely chopped dill, optional
4 eggs separated
2 T butter, plus a bit more for greasing the souffle dish
salt and pepper to taste
Preheat oven to 375 and lightly grease a souffle dish or other deep, straight sided casserole dish. Cook carrots in a small amount of salted water, either on the stove top or in a microwave until tender. Drain and set aside to cool a bit. Heat the milk in a heavy bottomed sauce pan to simmering, add a pinch of salt, whisk in the grits and cook covered over very low heat, stirring occasionally, until the liquid is absorbed and the grits are cooked. See your package directions for time as it will vary depending on whether you are using quick grits or old fashioned grits. Leave covered and set aside to cool a bit. While the grits and the carrots are cooling, cook the chopped onion in olive oil until soft and translucent.
In a food processor fitted with a metal blade, add the carrots, grits and onion and buzz until the carrots are pureed and all is well mixed. Add in the cheddar cheese, dill, butter and egg yolks and process until fully incorporated. Buzz in salt and pepper to taste. Move this mixture to a large bowl.
In a separate bowl, beat the egg whites until stiff peaks form.
Whisk about 1/4 of the egg whites into the the carrot mixture until fully blended to lighten it.
With a large spatula, gently fold the remaining egg whites in, incorporating them in pretty well, without over mixing. It's O.K. to see a few small stray bits of egg white. Fold into the greased dish and bake at 375 for about 1/2 hour without opening the oven door. It will probably still seem jiggly in the middle at the point, turn oven down to 350 and bake for approx another 10-15 minutes, until it seems firmer but not dried out. Remove from oven and serve.
[Posted by Ruth]
Stone Gardens Farm offered a winter share pick up in January. I hope plenty of people took advantage of it. It was a great value and a great way to continue to support a local farm. We got 5 nice sized butternut squash, 3 acorn squash, an enormous bag (5 lbs+) of carrots and a head of cabbage. We also opted for a dozen eggs and a fresh chicken while we were at it. As always, the quality was excellent. The carrots are especially sweet. We had some of them with a honey, ginger, grapefruit glaze but scarfed them up before I could get a picture.
I wanted to get going on using up some of the butternut squash right away and also wanted to make something a little different this time. I suppose we can call it a gratin, since it contained goat cheese, although it was not as rich as gratins usually are. The flavor was almost like a warm salad. The maple syrup played up the sweetness of the squash while the sherry vinegar and the goat cheese gave it some more depth and kept it from being too sweet. We had this is a main course and it was very satisfying. It would also work well as a hearty side dish to simple roast chicken, etc.
Gratin of Butternut Squash with Goat Cheese
8 cups Butternut squash, peeled and cut into cubes (this was 2 medium sized squash)
1/2 cup diced Onion
2 T Extra Virgin Olive Oil
1 T fresh Sage leaves, minced
3-4 T Maple Syrup
2 T Sherry vinegar
1 cup coarsely chopped Walnuts
4-5 oz fresh Goat Cheese
2 T butter
salt and pepper to taste.
Preheat oven to 350 and lightly butter a large casserole dish. Cook onion in olive oil over medium heat until softened and translucent, but not browned. Stir in the sage, maple syrup and vinegar cook for about 1 minute. Toss the cubed squash with the onion mixture, walnuts, salt and pepper in the casserole until well blended. Break the goat cheese into small pieces and gently mix into the squash mixture. Dot the top with the 2 T butter, cover and bake for about 1 hour, until squash is cooked through. Remove cover, raise heat to 375 and cook for another 10-15 minutes. Serve.
[Posted by Ruth]
Now that the holidays are over, it's time to take a breath and dive back into things. Even though we're solidly in winter, Stone Gardens Farm offered a winter pickup of squash and root vegetables for the coming week. Right after I signed on for another box from the farm I realized that I still had a couple of pumpkins and a huge butternut squash hanging out in our cold garage waiting for me to stop baking (and eating!) cookies and deal with them before I go get more on Thursday.
Since it was the middle of the week and both boys were still home for the holidays I wanted something that was homey and filling but not not more effort than I wanted to make at the end of the work day. One of the pumpkins was so cute and perfectly formed that it would have been a shame to hack it up. So, a pumpkin stuffed with risotto seemed like the thing to do.
Sage Risotto Baked in a Pumpkin
Note: these are the proportions that worked for this pumpkin. Once you scrape the seeds out of your pumpkin check the volume by filling it with water and measuring how much it holds. Don't have the total volume of water + rice exceed this amount.
1 small sweet eating pumpkin, top cut off and seeded.
1 cup arborio rice
1/3 cup finely chopped onion
1 clove garlic, minced
2 T olive oil
2 T dried sage leaves, crushed,
or 1 T fresh sage, finely chopped
1/4 cup dry white wine
2 cups chicken or turkey stock, preferably homemade (we had buckets of turkey stock from Christmas)
1 cup grated Parmesan cheese, divided
Salt and Pepper to taste (remember when seasoning that you have to put in enough salt and pepper to season the pumpkin flesh as well.
Preheat oven to 350. Warm the stock in a saucepan or microwave until hot but not boiling. Heat oil in a heavy saucepan over medium heat and saute the onion and garlic until soft and translucent. Add the rice and sage and continue cooking over medium heat until all the grains are well coated with oil and heated through, about 3-4 minutes. Pour in the wine and and continue to cook until all the wine is absorbed into the rice. At this point, add all of the hot stock, salt and pepper and bring up to simmer.
Place the cleaned out pumpkin in a lightly oiled baking dish. (A 9 x 13 inch baking pan works well here. It will be deep enough to catch the liquid in case your pumpkin springs a leak) Put a little salt and pepper in the pumpkin and pour the hot rice and all of its liquid inside. Put 1/2 of the Parmesan cheese on top, top with the the pumpkin's lid and bake. Begin looking at around 1 hour. Mine took closer to 1 1/2 hours before the liquid was fully absorbed and the pumpkin was fully cooked. Don't cook to the point where the pumpkin collapses as you want to use it to serve the rice.
When done, remove from oven and serve with the remaining cheese on the side. Have people scoop out pumpkin along with the rice.
The rice won't come out al dente as it would if you make it on the stove top, stirring in a little stock at a time, but it's soft and lush and flavorful. Perfect mid-winter comfort food.