skip to main |
skip to sidebar
[Posted by Ruth]
The late summer/early fall boxes have been brimming with great stuff. Eggplants, leeks, ripe tomatoes, the sweetest corn of the year so far and more. I wanted to put a meal together that let me dive right into the box this week. The eggplant, leeks and tomatoes definitely seemed to belong together and I'd been reading a lot about oven frying eggplant slices, so I decided on a deconstructed version of Eggplant Parmesan.
Deconstructed Eggplant Parmesan
serves 4
1 recipe Oven Fried Eggplant, see below
1 recipe Tomato/Leek sauce, see below, or your favorite sauce - it should be quite thick
8 oz smoked mozzarella or fresh mozzarella, thinly sliced
Heat oven to 375. Leave the eggplant slices in the pan (see below), spoon sauce on top, enough to cover, top with sliced cheese and bake until cheese is bubbly; about 5-10 minutes, depending on how warm everything already is when you put it in the oven.
First to the oven fried eggplant. Is it just as good as pan fried eggplant? Of course not. Don't be an idiot. Fried is crisper and better. But, unless you're working hard at gaining weight, why not find a good alternative? I was intrigued by the recipes that incorporated mayonnaise and wanted to try that. I didn't think it was worth the bother to coat both sides and flip over half way through cooking and decided to also add some cheese to the mix. We all liked it that way so, for me, this one is definitely a keeper.
Oven Fried Eggplant
2 medium/large eggplants, peeled and sliced into 1/2" discs
Salt and pepper
1 cup mayonnaise
1/2 cup panko bread crumbs
1/3 to 1/2 cup finely grated Parmesan cheese
2 T olive oil, plus more for greasing pans
Preheat oven to 375 and grease 2 heavy jelly roll pans. Toss the sliced eggplant with a little salt and pepper and set aside. Blend the mayonnaise, bread crumbs, cheese and olive oil. Season with a bit more salt and pepper to taste. Spread the mayonnaise mixture on one side of each eggplant disc. Spread enough to cover fully but not too thickly. Place uncoated side down on greased pans and bake at 375 for 35 to 45 minutes, rotating the pans once or twice to ensure even browning. When topping is nicely browned and eggplant is cooked through remove from oven and let sit a while before trying to handle if you are using these in a different recipe.
For our version, I made a fresh tomato leek sauce and we topped it offt with smoked mozzarella. The verdict on the smoked mozzarella was split. Half of us preferred the flavor and the other half would have preferred the less dry fresh mozzarella.
Tomato/Leek Sauce
This was a good way to use the herbs our CSA provided us to plant earlier in the season
4 or 5 Large ripe tomatoes, cored and diced
2 large leeks, white part only, halved and sliced thinly
2 T olive oil
2 sprigs rosemary
6 sprigs oregano
1 small bunch fresh basil
5 sprigs thyme
1/2 tsp red pepper flakes
1 T honey
Salt and Pepper to taste
In a heavy pan, heat the olive oil and add the leeks. Cook over medium heat, stirring often until they soften. Add the diced tomatoes and the rest of the ingredients. Bring to a steady simmer and cook uncovered, stirring occasionally until thickened. To use to top the eggplant discs, cook until most of the liquid is evaporated and the sauce is quite thick.
[Posted by Ruth]
In the last couple of weeks we've gotten quite a few Jalapeno and other hot peppers as well as a bag of tomatillos. Time to go a little Mexican with the farm share, especially since our older son, who spent 2 1/2 years in South Texas, was home for a visit.
For the salsa, I wanted to get a roasted flavor without the fuss of trying to grill the tiny tomatillos so I pan roasted the tomatillos and tomatoes and liked the outcome. A bonus with the salsa was that the next day I added a few more tomatoes and a cut up cucumber to the leftovers and came away with pretty decent gazpacho.
Roasted Salsa
1 small package tomatillos, husks removed
2 medium tomatoes
1 jalapeno pepper, or more to taste
1/2 medium onion, chopped
1/2 cup Cilantro, chopped
1/4 tsp chipotle powder
1/4 tsp ground cumin
salt and pepper to taste
Heat a dry heavy skillet on high heat until a drop of water bounces around when dripped on it. Add the whole tomatillos and keep moving in the pan. They will quickly brown/blacken. Remove when they have a fire roasted look and smell, before they cook enough to begin to break apart. Set aside.
With the pan still on high head, add the two whole tomatoes and roll around until the skins blacken. Again, remove before they begin to to cook down. Set aside.
While the tomatoes and tomatillos are cooling chop the onion and cilantro. When cool, coarsely chop the tomatoes and halve or quarter the tomatillos, depending on their size. Add to the onion mixture and stir in the rest of the ingredients. Let rest for at least a half hour for the flavors to develop and for the tomatoes and tomatillos to give up their liquid.
Bonus Gazpacho the next day.
Add a couple more tomatoes (no need to roast them) and a large cucumber, peeled and cut into small chunks. Adjust seasoning and chill for at least an hour.
Jalapeno Poppers
These are best done outside on the grill
For the Jalapeno poppers we played with using all cream cheese or all goat cheese and decided that a mixture of both would probably be perfect.
Jalapeno peppers, or other hot peppers
Thick sliced bacon strips, cut in half crosswise
cream cheese, goat cheese or a mixture of both (we liked a ratio of about 1 part goat cheese to 2 parts cream cheese)
Note: if you mix the cheeses, soften them first, blend well and then chill them for about an hour before filling the poppers. The stiffened cheese will be less likely to fall out of the popper when grilling.
Wooden toothpicks, soaked in water for 1 hour
For 7 or 8 Jalapenos we used 4 oz cream cheese, 2 oz of goat cheese and about 3/4 lb of bacon.
If the Jalapenos are very hot cut them in quarters, lengthwise, remove the ribs and seeds. Place a hunk of the chilled cheese inside the pepper, roll the bacon around it, taking care to fully cover the cheese. Secure with toothpicks.
Grill over hot coals, turning gently to evenly brown the bacon. You will loose some cheese as it melts, but if you are gentle and have wrapped the bacon well enough, you shouldn't loose too much.
By the way, if you are a contact lens wearer like me, wear gloves or get someone else to cut the peppers. Every time I forget to do this I wind up red eyed and angry at bed time when I try to take them out.
[Posted by Ruth]
We got another bunch of Purslane in our farm box this week so I went the no cook way this time and used it to make Pesto. Because the flavor of Purslane is distinctly different from that of Basil, I decided to change some of the other traditional ingredients as well, while still keeping the basic ratios the same. So, instead of pine nuts or walnuts, this Pesto has roasted, salted cashews. They are a bit richer and creamier and work well with the Purslane, which has more bite than Basil. Sticking with the creamier idea, I put fresh goat cheese in in place of Parmesan.
This worked pretty well. We spread it on slices of local Wave Hill bread and topped it with thin slices of avocado and tomato and some fresh eggs, scrambled with a bit of sour cream. Nice, quick, easy Friday night meal.
Purslane Pesto
1 bunch Purslane, leaves and tender stems, about 3 1/2 cups
2 cloves garlic
1/2 cup roasted, salted cashews
4 oz fresh goat cheese
1/2 to 3/4 cup extra virgin olive oil (depending on how thick you want it)
juice of 1/2 lime or lemon
salt and pepper to taste
dash of Tabasco if you like
Put the Purslane and garlic in a food processor and pulse until finely chopped. Add the cashews and pulse again until they are finely chopped. Add the goat cheese, lime or lemon juice and process. With the motor running, drizzle in the olive oil until it is the consistency you want; thicker for using as a spread, thinner if using as a pasta sauce or dip. Taste and add salt, pepper and Tabasco to your liking.
[Posted by Ruth]
It's not every day that you can point to some weeds by the roadside while walking the dog and tell your family, "See that? That's what we're having for dinner tonight." Thanks to our farm share keeping things interesting, that's exactly what I got to do last night.
We got a bunch of Purslane in our boxes yesterday and I was really interested to try it out. If you google Purslane, you'll find that while considered a weed in this country it is cultivated as a food in others, like India. Purslane is high in Omega III fatty acid, more than any other leafy plant, and very good for you. But....how would it taste?
I first tasted both the leaves and tender stems raw. The stems are quite flavorful, with an almost salty taste and the leaves have a fresh, green taste. The salty, slightly bitter aspect seemed like it would blend well with some garlic and ricotta, so we had it in a pie. We all liked it. This one is definitely a keeper, so I guess I'll have to start foraging for Purslane! Please note, if you decide to look for it, don't take if from along the roadside or anywhere where it may have been exposed to chemicals.
Purslane Ricotta Pie
1 bunch Purslane, leaves and tender stems roughly chopped (this worked out to be about 2 1/2 to 3 cups, chopped)
2 cloves garlic, minced
1-2 T Olive Oil
16 oz Ricotta Cheese
3 eggs
2-3 T grated Parmesan Cheese
Salt and pepper to taste
1 unbaked Pie Crust
You can use your favorite recipe, a store bought crust, or this Olive Oil Crust which is what I used to keep things a bit more healthy. You can also use this Butter Pie Crust recipe if you're feeling like something richer.
Preheat oven to 375.
Line a pie pan with the pastry of your choice. I used an 8 inch, deep dish pan for this. It should fit in a standard 9 inch pan as well.
Heat olive oil in pan and gently saute the purslane and garlic until tender and slightly wilted, about 5 minutes. Let cool slightly.
In a separate bowl, combine the ricotta and eggs and stir until fully incorporated. Fold in the purslane mixture and blend well. Add salt and plenty of pepper to taste.
Brush a small amount of olive oil over the surface of the pie crust and put the purslane/ricotta mixture on top. Smooth over the surface. Sprinkle the grated Parmesan on top and bake until set in the middle. For the 8 inch deep dish this took 50 minutes.
[Posted by Ruth]
Lately, we've been bombarded with cucumbers in our farm share. I love fresh cucumbers but am not a huge fan of pickles. I just picked up a new share today and realized that I still had several cucumbers lurking in the lower depths of the fridge. What do to?
Our younger son, Banning, is really into juicing these days and last time he was home he brought my husband a juicer. I figured I'd give it a shot. Worst case, it would be awful but at least I could say "I tried" while tossing out the failed attempt at potability.
Instead, I got something I really liked. It's quick and refreshing and I'm thinking I may just have to try it again later with a splash of Hendricks Gin and a little seltzer.
As an added bonus...it's a beautiful shade of green.
Cucumber Mint Juice with Lime
Makes about 1 quart
If you don't have a juicer, you can blend and then strain the juice.
5 to 7 cucumbers
Approx 1/2 cup fresh mint leaves
Juice of 2 limes
Run unpeeled cucumbers and mint leaves through the juicer. When finished, add the lime juice and chill.
[Posted by Ruth]
Here's what we have for Week 2.
One of my favorite food blogs, The Bitten Word, had a great suggestion last year to help manage the weekly onslaught of produce from a CSA. Use a simple white board to keep track of what you get in each week, and what is leftover from the previous week. This has been a big help in keeping on top of what we've used and what is waiting to be used. I put a second one on the door of my downstairs freezer, to help me keep track of what's in there as well. Maybe it's just me, but I find it really satisfying to erase each item as we finish it. It feels like a tiny victory. (Yes, I know, I should probably get a life.)
Facing the board the last night of week one, I realized I still had a lot leftover. We'd made our way through the salad greens, but still had kale, 1/2 the Asian mix, 1/2 the dandelion greens, one bok choy and some chard. Time for a clean out the fridge meal.
The reality of trying to use everything in a CSA farm share is that you're often faced with a hodgepodge of produce and no set plan. Where are you going to find a recipe for a few partial bags of this and that and a bit of wilted something else? Sometimes, you just have to pull it all out, chop it up, get in in a pot and hope for the best. So, rather than provide a set recipe, I thought I'd let this post reflect the way I really cook many nights; which is more ingredient, seat of the pants based, rather than following a set recipe. The key here is to channel your inner Julia Child, serve it with confidence and, as she would say, "Never explain, never apologize!"
Along with all those greens, I had a bag of green French lentils, some mushrooms, a hot pepper, some onion and a few leftover cloves of roasted garlic. Time for beans and greens.
Beans and Greens, basic game plan
(Mark Bittman's book "How to Cook Everything Vegetarian" has some great suggestions as well)
Coarsely chop a seemingly impossible amount of greens and set aside. I had 8+ cups.
In a heavy bottomed pot, saute onions, peppers, garlic and mushrooms in olive oil.
Add the greens, if you have tons, you may have to do this in stages to allow the volume to go down a bit.
Season to taste - you can keep this as simple as salt and pepper or have it take any direction you like:
Head southwest, with cumin, chile powder, etc. (I did cumin, aleppo pepper and chipotle pepper with a bit of Worcestershire sauce)
Go Asian, with ginger, soy, hoisin sauce and some sesame oil added at the end
Try French: add tarragon, thyme and a bit of lavender and some wine
etc.
Add your beans, the lentils are great because they don't require presoaking, but you can add any presoaked beans you like, or even canned in a pinch.
Add enough water or broth to cook the beans, usually at least double their volume, and cook slowly until beans are tender, checking along the way to see if more liquid is needed. You can taste the broth along the way to adjust the seasoning. It should seem flavorful, not bland.
Serve with rice, pasta, quinoa, etc. and relax. You've cleaned out the fridge... for now!
[Posted by Ruth]
In our boxes this week we got a half bag of Braising Mix. If you're unfamiliar with Braising Mix, also known as Saute Mix, its made of up more mature sections of what is normally found in a baby salad greens mix. It will often consist of shoots from greens that have bolted or gone to seed, a little too rugged to be included in a baby salad mix but still too tender to require as much cooking as a fully mature green.
This makes Braising Mix ideally suited to a quick meal. It is at its best when given a quick saute or when tossed with a hot dressing for a wilted salad.
Preparation:
As you can see in the earlier photo, Braising Mix is often pretty 'stemmy'. Although you could tear the leaves off the stems, this is time consuming and will produce too much waste. The best bet, after a thorough washing and spinning dry, is to take a moment to line them up with the stems pointing in one direction, a few hands full at a time, and chop the stems into approx 1" sections. This will let them add flavor and crunch to your finished dish, without sticking someone with a mouthful of long, chewy stem.
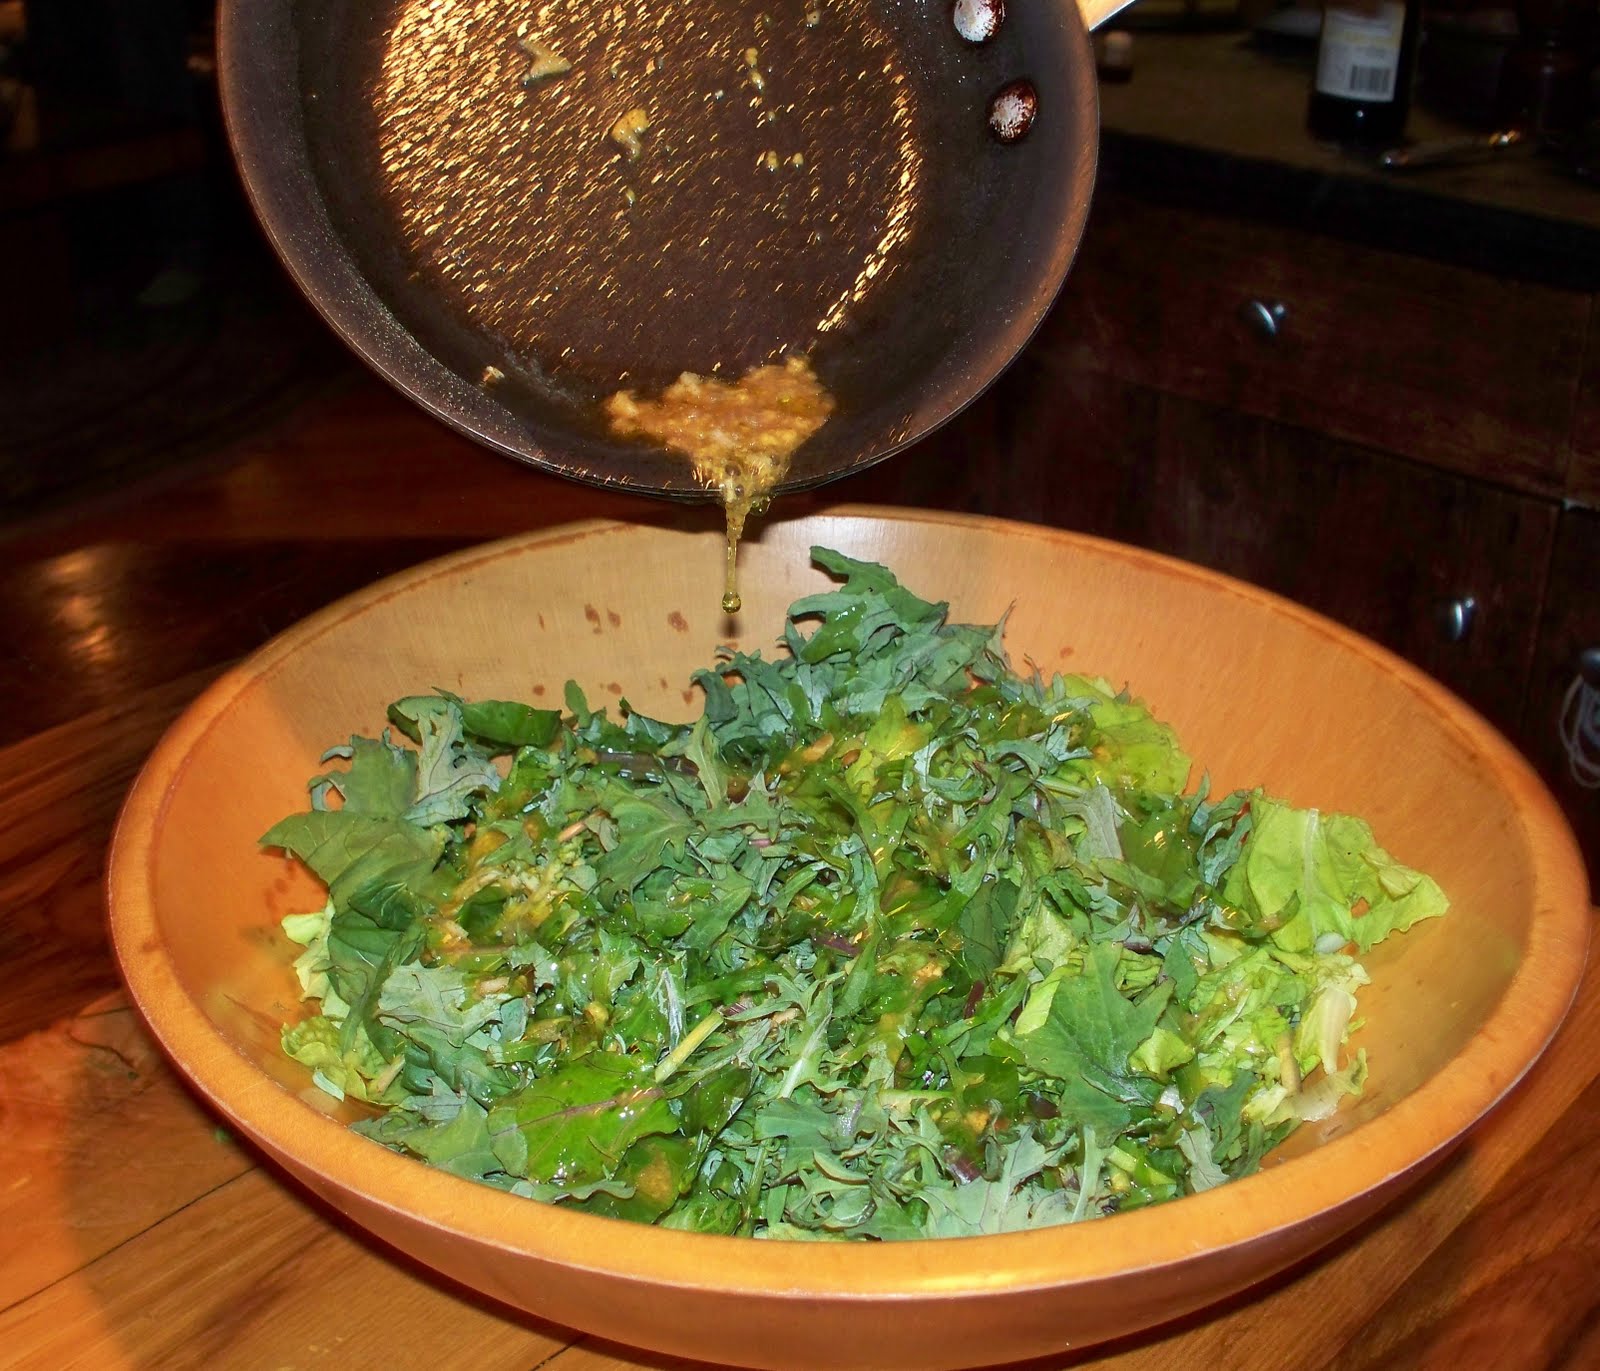
To preserve the fresh taste and vibrant color of this mix, I went with a quick wilted Salad Dressing
Braising Mix with Warm Honey Mustard Dressing
1 large clove garlic. minced
1/4 cup extra virgin olive oil
2 T prepared mustard
1 T honey
4 tsp apple cider or sherry vinegar
salt and pepper to taste
1/2 bag Braising Mix
Prepare Braising Mix as directed above and have it waiting in the bowl you will use to serve it.
Heat oil in a small, heavy pan over medium heat. Add minced garlic and sizzle gently to cook the garlic a bit. Do not brown the garlic. Stir in the honey and mustard until blended in. Stir in the vinegar, salt and pepper, sizzle for just a moment to ensure all it quite hot, but not enough to cook off the vinegar. The mixture will still look somewhat separated. Immediately, toss the hot dressing into the Braising Mix until thoroughly blending and wilted a bit.
Serve the same way you would serve a side salad. We found this went really well with the roasted potatoes we had the same night. The color was terrific.
[Posted by Ruth]
Broccoli Rabe, also known as Rapini, Broccoletti and by several other names, is not actually related to Broccoli at all. While its tops and yellow flowers somewhat resemble broccoli, it is a decedent of a wild herb and more closely related to turnips. A lot of recipes online call for blanching it first in an effort to tame its bitterness, but this seems counterproductive to me. Why not use the bitterness and add flavors that compliment it? Maybe its my age showing, but I'm all about embracing the bitterness these days.
Broccoli Rabe with Caramelized Onions and Mushrooms.
Property caramelizing the onions makes this dish take a while longer but makes a big difference in flavor.
1 bunch Broccoli Rabe, stems and all, coarsely chopped. Trim about 1 inch off the bottoms of the stems
(other than this little bit of trimming, you can use the entire plant, flowers and all)
1 large Vidalia Onion, or similarly sweet onion, halved and very thinly sliced
8 oz Baby Bella Mushrooms, sliced
1 T butter
1 T extra virgin olive oil, plus more to add later if needed
1/4 tsp red pepper flakes
salt and pepper to taste
1 1/2 cups grated Romano or Parmesan Cheese
8 oz Pasta, cooked according to directions. Cook the pasta after the onions are caramelized.
Heat the Butter and 1 T of olive oil in a large, heavy pan over medium, low heat. Add the onions and cook, stirring occasionally, until they are caramelized. Turn heat lower if they begin to brown too fast. They will take between 40 and 60 minutes to fully caramelize but it's worth the time. This will add depth and sweetness to the end result. Its not necessary to ever add sugar to caramelize onions, their own sugars will do it naturally.
When they are caramelized, stir in the mushrooms and cook at a slightly higher temperature until they begin to brown and give off their juices. Add the Broccoli Rabe, salt, pepper, red pepper flakes and a bit more olive oil, if needed. Cook, stirring, until the Broccoli Rabe has wilted and then cover and cook over low heat for a few minutes until it reaches the consistency you like. Don't overcook. Stir in the cooked pasta with about 1/2 cup of its cooking water and then fold in the cheese. Toss well and serve.
[Posted by Ruth]
Last year, I made a fairly miserable meal out of grilled baby bok choy. It was completely my fault; didn't wash it enough, didn't marinade it enough and didn't grill it long enough. So, aside from being gritty, tasteless and undercooked, it was terrific.
Fast forward to the last two weeks. We got some Baby Bok Choy in each box.
Look at it sitting there, green and cute....mocking me... It was time to face my bok choy fears.
Baby Bok Choy and Shrimp Braised in Coconut Curry Sauce
6 small heads of baby bok choy, cut in half (cut larger ones in quarters)
(note, wash them again after cutting, grit hides down in the recesses of the leaves)
1 T butter
1 T olive oil
1 lb medium raw shrimp, cleaned
1 can coconut milk (I used light)
2 T red curry paste (or more to taste)
2 T natural peanut butter
2 T brown Sugar
salt, pepper to taste
Heat butter and olive oil in a large, nonstick pan over medium, high heat and lightly brown the baby bok choy on the cut side. Remove bok choy from pan and set aside.
Lower the heat on the pan and stir in the curry paste, peanut butter and brown sugar. Cook, stirring constantly, until all is well incorporated and the mixture begins to get very fragrant. Stir in the can of coconut milk, raise the heat, bring to a slow boil and cook, stirring, for about 5 minutes to thicken slightly. Taste sauce and add salt and pepper as needed. Place the bok choy back in the pan, pressing the cut sides down into the sauce and simmer, covered, for about 5 minutes. Add the shrimp, pressing them down into the sauce as well. Simmer, uncovered, until the bok choy is tender and the shrimp is cooked through, about 5 more minutes. Serve with Jasmin Rice.
It was flavorful, cooked enough, not gritty and still a reasonably quick meal to prepare. This round goes to me, Baby Bok Choy.
[Posted by Ruth]
The 3rd installment of our Spring Share brought an interesting twist, Garlic Mustard. I've pulled this flowering weed out of my own herb garden, but never thought to eat it. The taste is mild and reminiscent of garlic, much milder than the Garlic Scapes we're looking forward to later in the season. Garlic Mustard can be used raw in salads, or for pesto, but I decided to cook it with the the Beet Greens we got this week. I sauteed them with bacon and some onion, added black eyed peas and served them over 'Forbidden Rice'.
Forbidden Rice is a small grain black rice, originally from China. It got its name because it was a favorite of the Emperor and, therefore, forbidden to the general public. The rice has a mild, nutty flavor, a firm texture and actually cooks up quite purple, also coloring the cooking liquid purple.
Sauteed Garlic Mustard and Beet Greens over 'Forbidden Rice'
1 bunch Garlic Mustard, leaves and flower buds, coarsely chopped
1 bunch Beet Greens, coarsely chopped
4-6 oz Bacon, cubed
3/4 cup finely chopped onion
1 1/2 cups cooked black eyed peas
zest of one lemon
salt and pepper to taste
1 cup, raw, Forbidden Rice, cooked according to package directions or any other rice of your choosing. The Forbidden Rice takes about 30-40 minutes, so start this first.
As always, wash the heck out of the greens and spin them dry.
Heat a large, heavy skillet over medium, high heat and saute the bacon until it is beginning to crisp and the fat has rendered out. Note, if there is more than a few tablespoons of fat in the pan at this point, remove the pan from the heat and soak up the excess fat with a paper towel. You want enough to coat and cook the greens, but no so much that it becomes greasy.
Add the onions to the remaining drippings and bacon and cook over medium heat until the onions soften. Stir in the Garlic Mustard and Beet Greens and cook, stirring, until wilted. Fold in the black eyed peas, lemon zest and salt and pepper to taste and cook until heated through and incorporated, 5-10 minutes over medium low heat.
Serve over the rice. You can pass yogurt or goat cheese to garnish, if desired.
This was another quick and healthy weeknight meal; on the table in under an hour.
[Posted by Ruth]
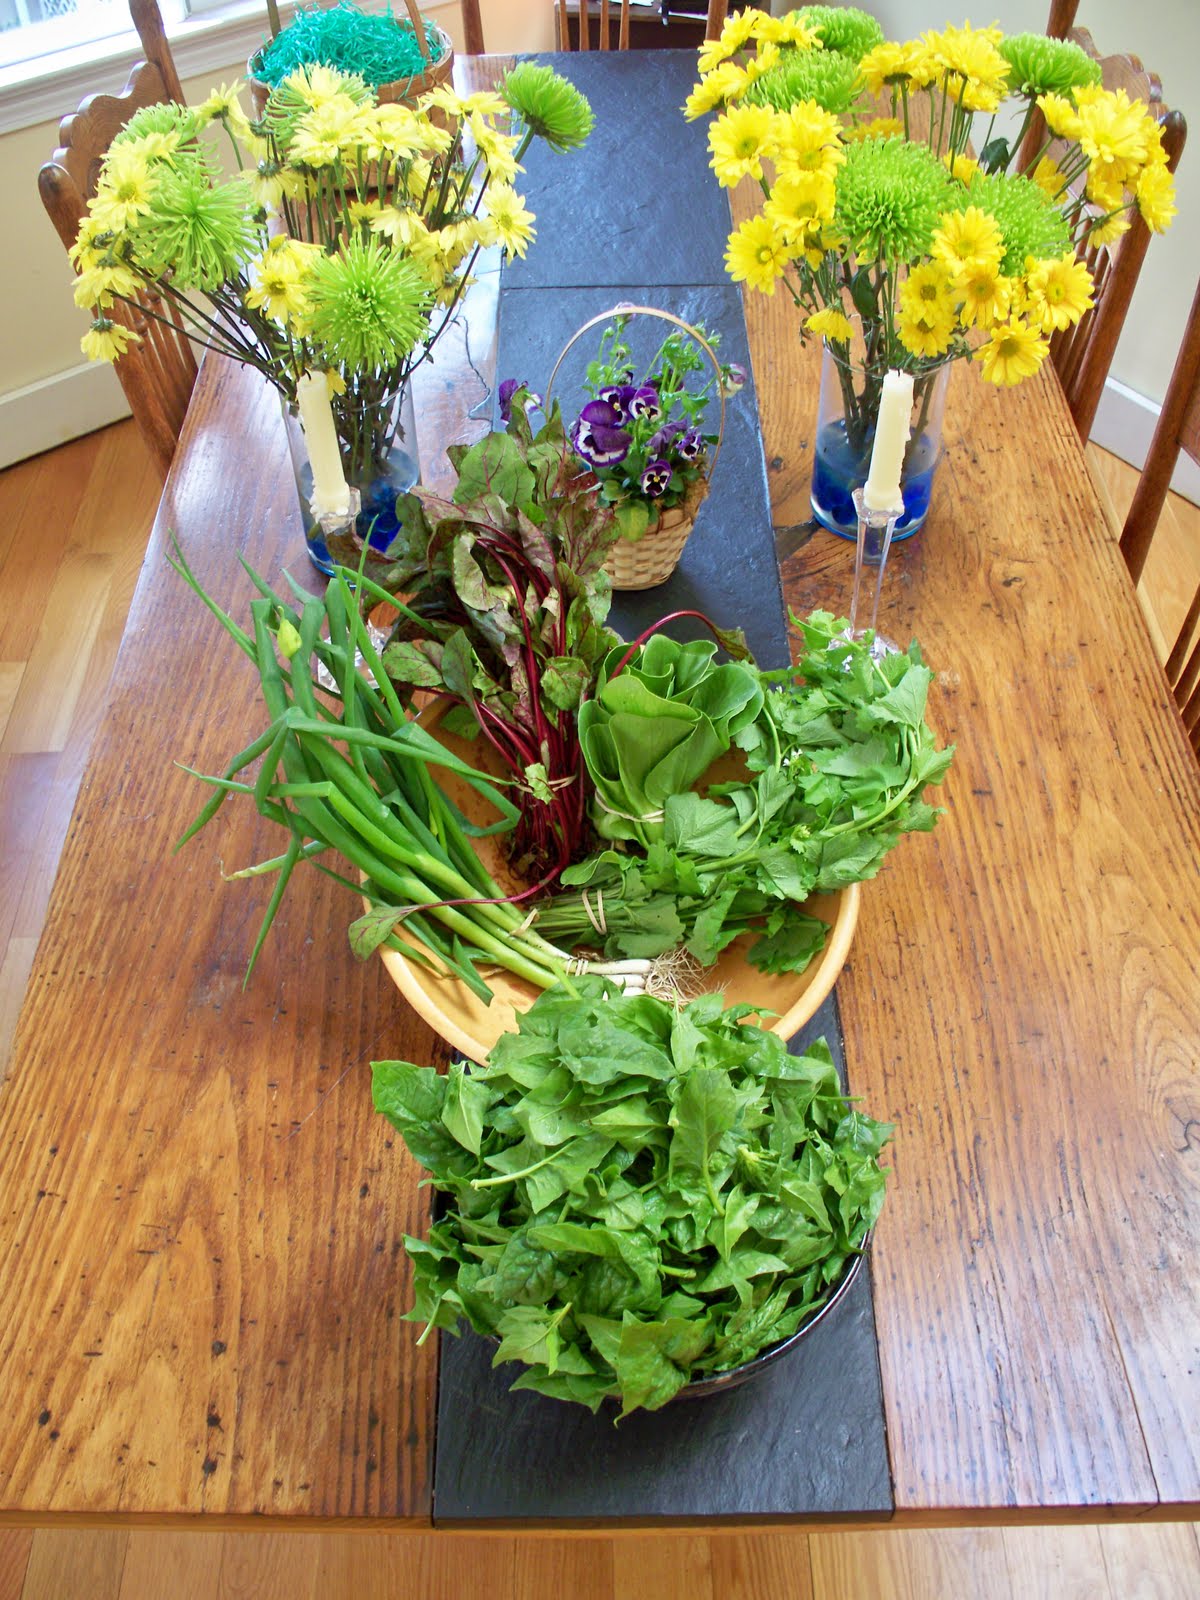
Our Spring Farm Share from Stone Gardens Farm will now be sending us a box a week. This means I will no longer be found frowning and muttering in the produce section of my local store. Just in time, I think I was starting to scare people. Here's what we got this week:
A large bunch of Dandelion Greens
A bag of Spinach
A bag of baby Kale
A bag of baby Lettuce
Small bunch of Radishes
Large bunch of Scallions
1 dozen Eggs
We added in 1 cut up chicken and were also able to get 4 more packages of their terrific Ground Beef.
I got everything washed and prepped right away. Last year taught me how important it is to do this. We went for the Dandelion Greens first and had them Thursday night.
Lamb and Dandelion Greens
This is a little bit of a cheat since the instructions should read, "First, cook too much lamb for Easter dinner." We used up our leftover lamb with this dish, but you could use any leftover lamb, beef, pork or chicken to add meat to this.
Approx 3 cups cooked lamb (or other meat) cut into small cubes
1/2 large onion, finely chopped
2 cloves garlic, finely minced
1 T olive oil
1 bunch Dandelion Greens, washed, spun dry and coarsely chopped
Zest of 1/2 lemon, finely chopped
1 T Herbs de Provence (if you don't have this a mixture of thyme and tarragon can be substituted)
Salt and Pepper to taste
1/3 cup cream
Heat olive oil in a large heavy pan over medium heat, add the onions and garlic and cook slowly until softened and a bit caramelized. Stir in meat and the Herbs de Provence and continue heating until it warms through. Add in the dandelion greens and lemon zest and cook stirring until the greens are wilted. Stir in the cream, salt and pepper and cook over slightly higher heat until the cream thickens. Serve over rice, grains or pasta.
One caution on dandelion greens. Wash them thoroughly by submerging them in several changes of water. Do this until you are sure they are clean and then do it about 2 more times. Just rinsing will not get all the dirt out.
[Posted by Ruth]
Our CSA, Stone Gardens Farm gave us a really great opportunity to purchase a Spring Greens share in addition to our full share and our first small pickup was this week. In our box we got a bunch of leeks, 2 pounds of very sweet baby carrots, a good sized bag each of baby lettuce and Asian mix and a dozen fresh eggs. It felt to good to be back picking up our box of fresh produce. It has definitely be a tough winter at the grocery store. Having regular access for part of the year to truly fresh food really spoils a person. I found myself looking down my nose at almost everything in the stores during these 'dark days'.
With the fresh leeks in hand and Spring in the air, a tart seemed like the thing to do.
Tart of Spring Leeks with Avocado
I used the same, healthier version, olive oil crust I used in this recipe.
You can use this or your favorite tart crust.
Roll crust out and place in a removable bottom tart pan.
Filling:
2 Ripe Avocados, halved and sliced lengthwise.
a bit of lemon juice to coat the Avocado slices and keep them green
1 small bunch of leeks, most of the green cut off, split in half lengthwise, cleaned and finely sliced
1 T Olive Oil
5 oz Fresh Goat Cheese, or other cheese, if you prefer
Salt and pepper to taste.
Preheat oven to 425. In a nonstick pan, heat the olive oil and gently cook the leeks with a bit of salt and pepper until they are softened. In the case of the leeks we used, they were already so fresh and tender they needed very little time in the pan. Larger leeks will take a bit longer to soften. Remove pan from heat.
Arrange the avocado slices around the tart pan, season with salt and pepper. Top with the leeks, distributing evenly and dot over the top with the cheese. Bake for approx. 25 minutes, until cheese has browned a bit and crust seems done. Remove from oven and let sit for at least 10 minutes before slicing. Can be served hot or at room temperature.
It was just what I was going for, light, fresh and definitely like Spring.
[Posted by Ruth]
With all the squashes and carrots in the winter share, there's a pronounced orange hue to the food around here lately. Still, I want to use it all and find a way to make things taste different, even it they are all starting to to look the same. The large bag or carrots we got in the January winter share have retained their sweetness and crispness so it seemed like it was time to feature them in a dish. I wanted to make a savory carrot souffle; I saw a lot of recipes for sweet ones on the internet but wanted to make one that felt more substantial to go with the cold, nasty, snowy, kill me is it Spring yet? weather we've been having lately.
This may initially sound like a lot of steps, but it actually went together without too much trouble. Because of the weight of the carrots and grits, this will not puff way up as some souffles, but it will still be light and airy inside.
Savory Carrot Souffle
2 lbs carrots, scrubbed, trimmed and cut into 1/2" rounds
1/2 cup onion, finely chopped
1 T olive oil
3 T Grits
1 cup milk
1 1/3 cups grated cheddar cheese
1/4 tsp finely chopped dill, optional
4 eggs separated
2 T butter, plus a bit more for greasing the souffle dish
salt and pepper to taste
Preheat oven to 375 and lightly grease a souffle dish or other deep, straight sided casserole dish. Cook carrots in a small amount of salted water, either on the stove top or in a microwave until tender. Drain and set aside to cool a bit. Heat the milk in a heavy bottomed sauce pan to simmering, add a pinch of salt, whisk in the grits and cook covered over very low heat, stirring occasionally, until the liquid is absorbed and the grits are cooked. See your package directions for time as it will vary depending on whether you are using quick grits or old fashioned grits. Leave covered and set aside to cool a bit. While the grits and the carrots are cooling, cook the chopped onion in olive oil until soft and translucent.
In a food processor fitted with a metal blade, add the carrots, grits and onion and buzz until the carrots are pureed and all is well mixed. Add in the cheddar cheese, dill, butter and egg yolks and process until fully incorporated. Buzz in salt and pepper to taste. Move this mixture to a large bowl.
In a separate bowl, beat the egg whites until stiff peaks form.
Whisk about 1/4 of the egg whites into the the carrot mixture until fully blended to lighten it.
With a large spatula, gently fold the remaining egg whites in, incorporating them in pretty well, without over mixing. It's O.K. to see a few small stray bits of egg white. Fold into the greased dish and bake at 375 for about 1/2 hour without opening the oven door. It will probably still seem jiggly in the middle at the point, turn oven down to 350 and bake for approx another 10-15 minutes, until it seems firmer but not dried out. Remove from oven and serve.
[Posted by Ruth]
Stone Gardens Farm offered a winter share pick up in January. I hope plenty of people took advantage of it. It was a great value and a great way to continue to support a local farm. We got 5 nice sized butternut squash, 3 acorn squash, an enormous bag (5 lbs+) of carrots and a head of cabbage. We also opted for a dozen eggs and a fresh chicken while we were at it. As always, the quality was excellent. The carrots are especially sweet. We had some of them with a honey, ginger, grapefruit glaze but scarfed them up before I could get a picture.
I wanted to get going on using up some of the butternut squash right away and also wanted to make something a little different this time. I suppose we can call it a gratin, since it contained goat cheese, although it was not as rich as gratins usually are. The flavor was almost like a warm salad. The maple syrup played up the sweetness of the squash while the sherry vinegar and the goat cheese gave it some more depth and kept it from being too sweet. We had this is a main course and it was very satisfying. It would also work well as a hearty side dish to simple roast chicken, etc.
Gratin of Butternut Squash with Goat Cheese
8 cups Butternut squash, peeled and cut into cubes (this was 2 medium sized squash)
1/2 cup diced Onion
2 T Extra Virgin Olive Oil
1 T fresh Sage leaves, minced
3-4 T Maple Syrup
2 T Sherry vinegar
1 cup coarsely chopped Walnuts
4-5 oz fresh Goat Cheese
2 T butter
salt and pepper to taste.
Preheat oven to 350 and lightly butter a large casserole dish. Cook onion in olive oil over medium heat until softened and translucent, but not browned. Stir in the sage, maple syrup and vinegar cook for about 1 minute. Toss the cubed squash with the onion mixture, walnuts, salt and pepper in the casserole until well blended. Break the goat cheese into small pieces and gently mix into the squash mixture. Dot the top with the 2 T butter, cover and bake for about 1 hour, until squash is cooked through. Remove cover, raise heat to 375 and cook for another 10-15 minutes. Serve.
[Posted by Ruth]
Now that the holidays are over, it's time to take a breath and dive back into things. Even though we're solidly in winter, Stone Gardens Farm offered a winter pickup of squash and root vegetables for the coming week. Right after I signed on for another box from the farm I realized that I still had a couple of pumpkins and a huge butternut squash hanging out in our cold garage waiting for me to stop baking (and eating!) cookies and deal with them before I go get more on Thursday.
Since it was the middle of the week and both boys were still home for the holidays I wanted something that was homey and filling but not not more effort than I wanted to make at the end of the work day. One of the pumpkins was so cute and perfectly formed that it would have been a shame to hack it up. So, a pumpkin stuffed with risotto seemed like the thing to do.
Sage Risotto Baked in a Pumpkin
Note: these are the proportions that worked for this pumpkin. Once you scrape the seeds out of your pumpkin check the volume by filling it with water and measuring how much it holds. Don't have the total volume of water + rice exceed this amount.
1 small sweet eating pumpkin, top cut off and seeded.
1 cup arborio rice
1/3 cup finely chopped onion
1 clove garlic, minced
2 T olive oil
2 T dried sage leaves, crushed,
or 1 T fresh sage, finely chopped
1/4 cup dry white wine
2 cups chicken or turkey stock, preferably homemade (we had buckets of turkey stock from Christmas)
1 cup grated Parmesan cheese, divided
Salt and Pepper to taste (remember when seasoning that you have to put in enough salt and pepper to season the pumpkin flesh as well.
Preheat oven to 350. Warm the stock in a saucepan or microwave until hot but not boiling. Heat oil in a heavy saucepan over medium heat and saute the onion and garlic until soft and translucent. Add the rice and sage and continue cooking over medium heat until all the grains are well coated with oil and heated through, about 3-4 minutes. Pour in the wine and and continue to cook until all the wine is absorbed into the rice. At this point, add all of the hot stock, salt and pepper and bring up to simmer.
Place the cleaned out pumpkin in a lightly oiled baking dish. (A 9 x 13 inch baking pan works well here. It will be deep enough to catch the liquid in case your pumpkin springs a leak) Put a little salt and pepper in the pumpkin and pour the hot rice and all of its liquid inside. Put 1/2 of the Parmesan cheese on top, top with the the pumpkin's lid and bake. Begin looking at around 1 hour. Mine took closer to 1 1/2 hours before the liquid was fully absorbed and the pumpkin was fully cooked. Don't cook to the point where the pumpkin collapses as you want to use it to serve the rice.
When done, remove from oven and serve with the remaining cheese on the side. Have people scoop out pumpkin along with the rice.
The rice won't come out al dente as it would if you make it on the stove top, stirring in a little stock at a time, but it's soft and lush and flavorful. Perfect mid-winter comfort food.