skip to main |
skip to sidebar
[Posted by Ruth]
Here's what we have for Week 2.
One of my favorite food blogs, The Bitten Word, had a great suggestion last year to help manage the weekly onslaught of produce from a CSA. Use a simple white board to keep track of what you get in each week, and what is leftover from the previous week. This has been a big help in keeping on top of what we've used and what is waiting to be used. I put a second one on the door of my downstairs freezer, to help me keep track of what's in there as well. Maybe it's just me, but I find it really satisfying to erase each item as we finish it. It feels like a tiny victory. (Yes, I know, I should probably get a life.)
Facing the board the last night of week one, I realized I still had a lot leftover. We'd made our way through the salad greens, but still had kale, 1/2 the Asian mix, 1/2 the dandelion greens, one bok choy and some chard. Time for a clean out the fridge meal.
The reality of trying to use everything in a CSA farm share is that you're often faced with a hodgepodge of produce and no set plan. Where are you going to find a recipe for a few partial bags of this and that and a bit of wilted something else? Sometimes, you just have to pull it all out, chop it up, get in in a pot and hope for the best. So, rather than provide a set recipe, I thought I'd let this post reflect the way I really cook many nights; which is more ingredient, seat of the pants based, rather than following a set recipe. The key here is to channel your inner Julia Child, serve it with confidence and, as she would say, "Never explain, never apologize!"
Along with all those greens, I had a bag of green French lentils, some mushrooms, a hot pepper, some onion and a few leftover cloves of roasted garlic. Time for beans and greens.
Beans and Greens, basic game plan
(Mark Bittman's book "How to Cook Everything Vegetarian" has some great suggestions as well)
Coarsely chop a seemingly impossible amount of greens and set aside. I had 8+ cups.
In a heavy bottomed pot, saute onions, peppers, garlic and mushrooms in olive oil.
Add the greens, if you have tons, you may have to do this in stages to allow the volume to go down a bit.
Season to taste - you can keep this as simple as salt and pepper or have it take any direction you like:
Head southwest, with cumin, chile powder, etc. (I did cumin, aleppo pepper and chipotle pepper with a bit of Worcestershire sauce)
Go Asian, with ginger, soy, hoisin sauce and some sesame oil added at the end
Try French: add tarragon, thyme and a bit of lavender and some wine
etc.
Add your beans, the lentils are great because they don't require presoaking, but you can add any presoaked beans you like, or even canned in a pinch.
Add enough water or broth to cook the beans, usually at least double their volume, and cook slowly until beans are tender, checking along the way to see if more liquid is needed. You can taste the broth along the way to adjust the seasoning. It should seem flavorful, not bland.
Serve with rice, pasta, quinoa, etc. and relax. You've cleaned out the fridge... for now!
[Posted by Ruth]
In our boxes this week we got a half bag of Braising Mix. If you're unfamiliar with Braising Mix, also known as Saute Mix, its made of up more mature sections of what is normally found in a baby salad greens mix. It will often consist of shoots from greens that have bolted or gone to seed, a little too rugged to be included in a baby salad mix but still too tender to require as much cooking as a fully mature green.
This makes Braising Mix ideally suited to a quick meal. It is at its best when given a quick saute or when tossed with a hot dressing for a wilted salad.
Preparation:
As you can see in the earlier photo, Braising Mix is often pretty 'stemmy'. Although you could tear the leaves off the stems, this is time consuming and will produce too much waste. The best bet, after a thorough washing and spinning dry, is to take a moment to line them up with the stems pointing in one direction, a few hands full at a time, and chop the stems into approx 1" sections. This will let them add flavor and crunch to your finished dish, without sticking someone with a mouthful of long, chewy stem.
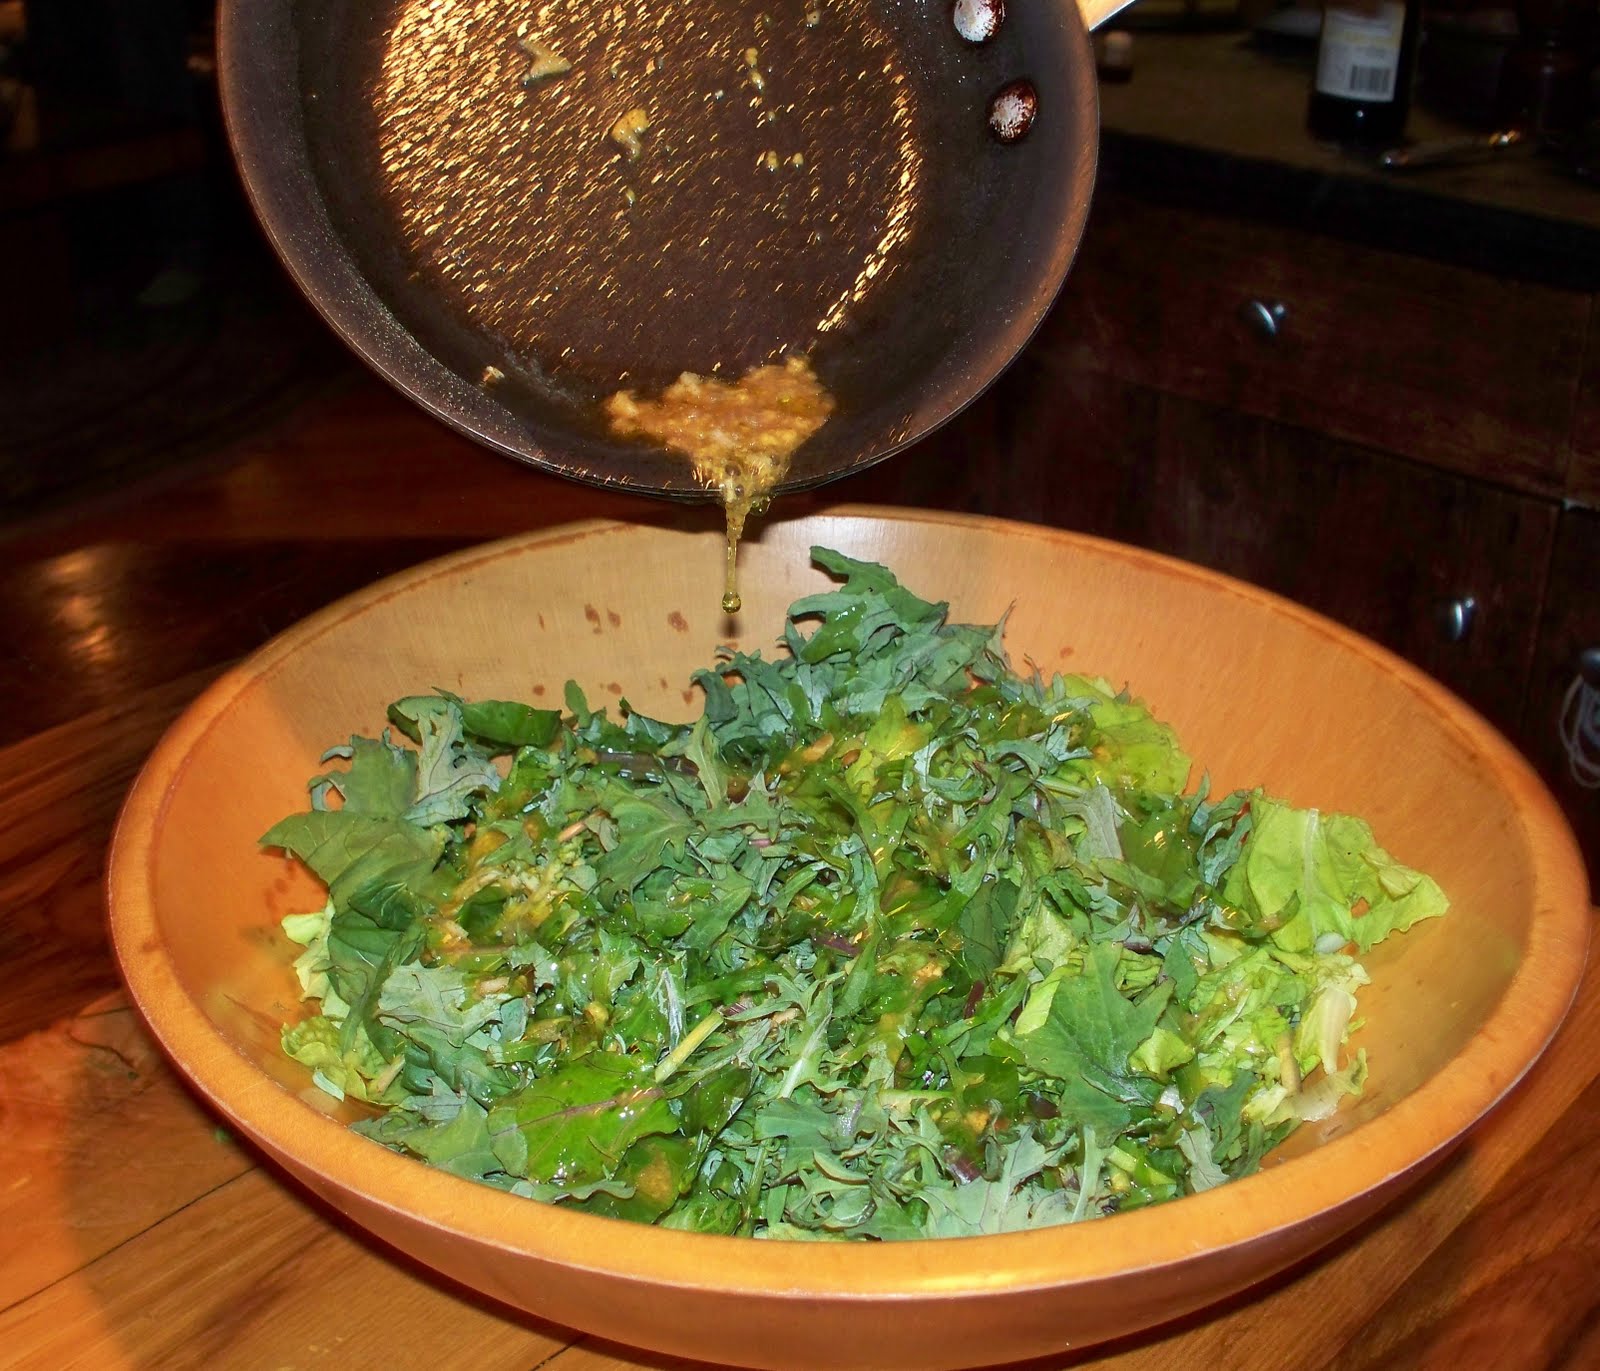
To preserve the fresh taste and vibrant color of this mix, I went with a quick wilted Salad Dressing
Braising Mix with Warm Honey Mustard Dressing
1 large clove garlic. minced
1/4 cup extra virgin olive oil
2 T prepared mustard
1 T honey
4 tsp apple cider or sherry vinegar
salt and pepper to taste
1/2 bag Braising Mix
Prepare Braising Mix as directed above and have it waiting in the bowl you will use to serve it.
Heat oil in a small, heavy pan over medium heat. Add minced garlic and sizzle gently to cook the garlic a bit. Do not brown the garlic. Stir in the honey and mustard until blended in. Stir in the vinegar, salt and pepper, sizzle for just a moment to ensure all it quite hot, but not enough to cook off the vinegar. The mixture will still look somewhat separated. Immediately, toss the hot dressing into the Braising Mix until thoroughly blending and wilted a bit.
Serve the same way you would serve a side salad. We found this went really well with the roasted potatoes we had the same night. The color was terrific.